
How to Make a Video of Photos on Instagram

Director of Tiny Toes by Aggi Ltd and co-founder of Safe Frame
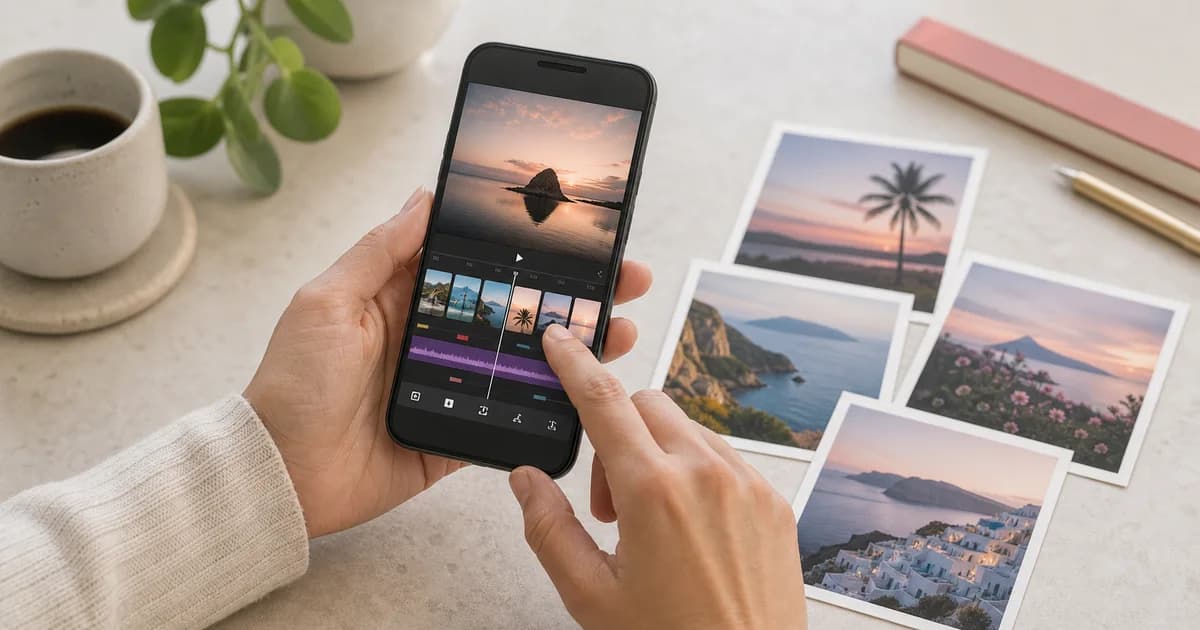
Instagram gives you several effective ways to turn still photos into something more dynamic. If you are wondering how to make a video of photos on Instagram, the most practical option is usually a Reel. It lets you combine multiple images, add music, adjust timing, use transitions, and publish the finished result as a vertical video.
Quick answer: how to make a video from photos on Instagram
- 1. Tap Create (+) in Instagram and choose Reel.
- 2. Open your gallery and select multiple photos.
- 3. Tap Next to place them on a Reel timeline.
- 4. Adjust the duration of each photo in Edit video or Edit clips.
- 5. Add music, text, stickers, transitions, or effects.
- 6. Tap Next, choose your cover and settings, then publish.
You also have other options. Reels Templates can automatically synchronize your photos with music, Stories can be saved as short video clips, and a photo carousel with music can work well when you want a swipeable slideshow rather than a true video file. Below, you will find instructions for each method and guidance on when to use it.
How to make a video of photos on Instagram using Reels
The most flexible way to make a video from photos on Instagram is with Reels. Instead of asking viewers to swipe through images manually, a Reel plays your selected photos as a vertical video sequence.
- 1. Open Instagram and start a Reel. Tap the Create (+) button. Depending on your app layout, it may appear at the bottom of the screen or near the top. Choose Reel.
- 2. Open your camera roll. Tap the small gallery icon in the bottom-left corner.
- 3. Select multiple photos. Tap the multiple-image icon, usually shown as stacked squares, and choose the photos you want to include. Select them in the order in which they should appear. Instagram generally allows up to 20 photos in a single Reel, although the interface may vary slightly by app version.
- 4. Add the photos to the Reel timeline. Tap Next, and Instagram will place the selected images on a Reel timeline.
- 5. Adjust the timing. To change how long a photo remains on screen, tap Edit video or Edit clips, select an individual photo clip, and drag the yellow edges to shorten or extend its duration.
- 6. Add music, text, and transitions. Tap Audio to search Instagram's music library. You can also add text, stickers, a voice-over, effects, and transitions. To insert a transition between photos, look for the small transition icon between clips in the editor and select an effect that suits your style.
- 7. Publish the Reel. Once everything looks right, tap Next. Add a caption, choose a cover image, tag people if needed, adjust your sharing settings, and publish.
Timing control matters more than it may seem. One image might work best as a quick cut, while another may need to remain on screen longer so viewers can take it in. In a birthday recap, for example, fast-paced candid shots can maintain the energy, while the final group photo may deserve a few extra seconds.
The fastest way to auto-sync photos to music with Instagram Reels Templates
If you want a polished result without manually adjusting every photo, Instagram Reels Templates are usually the quickest option. Templates are ready-made Reel layouts with timing, transitions, and music already in place. You simply replace the sample media with your own photos.
They are especially useful for travel recaps, outfit roundups, event highlights, food posts, fitness progress updates, and other photo collections that benefit from cuts synchronized to the beat of a song.
To use one, open Instagram and go to the Reels tab. As you scroll, look for a Reel labeled Use template. Tap it to see the clip placeholders and timing. Then tap Add media, select your photos, and let Instagram place them in the template automatically.
You may also be able to start from the creation screen by tapping Create (+), choosing Reel, and opening the Templates tab if it is available in your version of the app. Select a template, add your photos, preview the result, and then edit or publish it.
The main advantage is speed. Instead of estimating how long every image should remain on screen, the template handles synchronization for you. If the pace feels too fast or a photo is cropped awkwardly, you can still fine-tune the result before posting.
If you do not see Templates, update Instagram through the App Store or Google Play Store. Remember that not every Reel supports templates and that some features are introduced gradually depending on the account, device, and region.
How to turn photos into a video in an Instagram Story and save it
Instagram Stories offer another simple way to turn photos into a short video, especially when you want something quick for your camera roll or need animated elements without extensive editing.
- 1. Open the Story camera. Swipe right from your feed or tap Create (+) and choose Story.
- 2. Choose a photo from your camera roll. Tap the gallery icon and select an image. You can add more photos as separate Story slides or use layout and sticker tools to combine images in a more designed composition.
- 3. Add movement or audio. The Music sticker is useful, as are animated text, GIFs, stickers, and visual effects. Even one image can feel like a video-style Story once you add music and moving elements.
- 4. Save the Story as a video. When you are finished, tap the three-dot menu in the top-right corner and choose Save. Instagram will usually save the Story to your phone as a video file, often in MP4 format.
There is one limitation worth knowing in advance: if your Story uses copyrighted music from Instagram's music library, the version saved to your phone may not include that audio. This generally results from licensing restrictions, because music available inside Instagram is not always cleared for export outside the app. If the saved video must retain its soundtrack, original audio, royalty-free music, or editing in another app before upload may be more reliable.
If you use an iPhone, Live Photos may offer another shortcut. In some versions of Instagram, you can add a Live Photo to a Story and use the Story editing tools to turn it into a short animated clip or a Boomerang-style effect. The exact option varies by app version, but it is worth trying when you want quick movement from a single iOS Live Photo.
How to create an Instagram photo slideshow post with music
A carousel post is not technically a video, but it can still function like a photo slideshow in your feed. People swipe through the images manually, and when music is available, the post can feel more dynamic than a standard set of pictures.
To create one, tap Create (+) and choose Post. Open your gallery, tap the multiple-image icon, and select up to 20 photos. Arrange them in the desired order, make any necessary edits, and continue to the sharing screen.
If music is available for your post, tap Music and choose a song. In many cases, you can also select a specific part of the track before publishing. Then add your caption, tags, and location, and share the carousel.
This approach works best when you want viewers to spend time with each individual image. A photographer might use a carousel for a portrait series, while a small business could use it to show product details from several angles. If you want the photos to play automatically as one continuous piece of content, a Reel is the better choice.
| Method | Best for | Output |
|---|---|---|
| Reel with photos | Full control over timing, transitions, and music | A vertical video post |
| Reels Template | Quick, automatically synchronized photo videos | A beat-matched Reel |
| Story saved as video | Quick animated photo clips | A saved video file |
| Carousel with music | A swipeable photo slideshow | A feed post with music |
Photo-to-video limits, aspect ratios, and music restrictions to know first
Before creating a photo video, it helps to understand Instagram's formatting requirements. Reels are designed for vertical viewing, so the ideal aspect ratio is 9:16, or 1080 x 1920 pixels. If you upload square, horizontal, or very wide photos, Instagram may crop them or place them inside the frame with empty space around the image.
For a cleaner result, it usually helps to crop or edit your photos vertically before adding them to a Reel. This is particularly important when the subject is close to the edge of the frame. A wide group photo, for example, may lose people at the sides when adapted to a vertical format.
Access to music can also vary. Personal and creator accounts often have broader access to popular tracks, while business accounts may face more restrictions because of licensing rules. If you use a business account and cannot find a trending song, you may need to choose from Instagram's royalty-free or commercial-use music options instead.
It is also important to remember that Instagram drafts are stored locally on your device. If you save a Reel as a draft and later uninstall the app, log out, change phones, or clear the app's data, you may lose the draft. If the project matters, saving a copy to your device is generally the safer choice.
If you need more photos, more precise editing, or a saved version before posting, an external video editor can help. Popular mobile options include CapCut, Canva, and InShot. You can create the photo video there, export it to your phone, and upload the finished file to Instagram as a Reel.
A few practical habits can also improve the final result:
- Use vertical photos whenever possible so faces, products, and important details are less likely to be cropped.
- Keep each photo on screen long enough to understand it, often for around one to three seconds.
- Match the pace to the music: use quicker cuts for upbeat tracks and slower timing for scenic or emotional posts.
- Choose a strong cover image, because it affects how the Reel appears in your profile grid.
Common questions about making Instagram videos from photos
How do you auto-sync photos to music on Instagram?
Use a Reels Template. Templates have preset clip timing matched to the audio, so Instagram automatically synchronizes your photos to the beat when you add them. Find them by tapping Use template on an eligible Reel or by checking the Templates tab in the Reel creation area.
Why can't I see the Templates option on Instagram?
The feature may not be available on every Reel, account, or app version. Start by updating Instagram. If it still does not appear, browse more Reels because only some support templates. Availability can also vary by device and account type.
How many photos can you use in an Instagram Reel?
Instagram generally allows up to 20 photos in a single Reel created directly in the app. If you need more, you may have to assemble the video in a separate editing app and upload the finished file to Instagram.
Can you make a video from photos with music in Instagram Stories?
Yes. Add photos to a Story, use the Music sticker, and include animated text, GIFs, or effects if you want more movement. You can then save the Story as a video, although copyrighted music may not be included in the saved version.
Can you turn an iPhone Live Photo into an Instagram video?
Sometimes. If the option is available in your app, add the Live Photo to a Story and use Instagram's motion or Boomerang-style tools to create a short animated clip. If you do not see that option, first convert the Live Photo to a video on your iPhone and then upload it to Instagram.
Is a carousel the same as a photo video?
No. A carousel is a swipeable post, while a Reel is a continuous video. A carousel with music can still feel like a slideshow and may be the better option if you want viewers to control the pace.
What is the best method overall?
For most people, Reels are the strongest option because they create an actual video from your photos and provide access to music, timing controls, transitions, captions, and discovery through the Reels feed. Templates are best when speed matters most, Stories are useful for quick saved videos, and carousels work well when you want a feed-friendly slideshow.

Agata
Director of Tiny Toes by Aggi Ltd and co-founder of Safe Frame
Agata is the owner of a London-based photography studio with more than 10 years of experience in family and baby portraits. She has rebuilt her client workflow around faster selections, fewer screenshots, and a proofing experience that treats galleries as a sales step, not a dropbox.
View author page →Reviewed: April 13, 2026
Editorial policy
Related in this topic cluster
Safe Frame Blog
Actionable guides for photographers who want to protect images, speed up proofing, and increase print sales.
Build secure client galleries with SafeFramePro
Protect previews, speed up proofing, and increase print sales with one workflow.